Wednesday, 26 October 2016

My way of making Christmas Puddings


My grandmother used to make puddings for Christmas in February; I think that gave her time to add plenty of brandy!

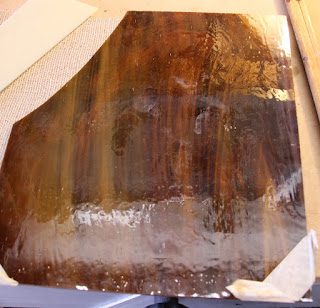
I've a couple of craft fairs lined up for the next month or so and I thought of her when I was going through my offcuts shelf recently, for I found a piece of brown/multi colour (fairly) opaque glass that I think I used to represent stone on my image of Bingley church:


I got to thinking whether I could make up some passable Christmas Pudding suncatchers (or tree decorations). I had several offcuts of opaque white to represent sauce (or icing); after playing with a cardboard template for a while I cut out a couple of samples and edged them in copper foil.


Rather than edge the brown glass to mate with the white in a single plane, I've chosen to plate the white over the brown disc. One sample has copper edging all round; on the other I've just edged those edges I'm going to solder - the appearance of the final piece, without a solder edge between the white and brown, may be better than that with, at the possible expense of strength - I'm not sure how well the piece without the supportive soldering will hold together.

I tinned these pieces using my 80w iron (itself tinned using multicore solder - it seems to be more effective for tinning irons than normal 60/40 solder and separate flux). I use plumbers flux paste, so, after tinning, the pieces were washed thoroughly, dried lightly with a towel, and despatched to the airing cupboard to dry off thoroughly.


Note to the unwary: failing to dry off all water after washing and before the next step (more soldering) will, very quickly, teach you why you should wear safety glasses when soldering!

Once dry, I soldered the pieces together and added a 4mm diameter loop of 0.4mm silvered copper wire, bought from a craft stall at Hitchin market. I also found some plastic decorative holly, meant for cake decoration - the only challenge with that was how to fix it to the puddings.


I ended up soldering another length of 0.4mm wire beside the loop, trimmed the holly and made a hole with a hot needle, and secured the sprig to the pudding by threading the wire hrough the hile and around the berries.

The one without the bottom run of solder (left above) is as solid as the other one; so long as it isn't biffed too much, or allowed to get too wet, it should hold together fine.

I did also experiment with adhesives (epoxy resin and UHU) to secure the holly to the glass but neither stuck well to the flexible plastic holly; both puddings therefore have been decorated using the soldered-wire-through-the-hole fashion, and are ready for the punters at the craft fair in Biggleswade on November 13th, and I've enough materials to make another eight by then (not all in the brown colour though) !

Thursday, 20 October 2016

Panel with lettering

One recent commission was a present for a ruby wedding anniversary. Made mostly from red water glass, it features initials cut from glass, and the dates applied with Letraset.


I used lettering designs from a book, but found that the 'D' was wider than the 'P'; having checked with an expert on fonts and design I revised them to be have the same width.

The panel is made using copper foil, rather than lead came - this is often more suited to detailed work, but does involve a lot of soldering.

I included loops at the top corners; nylon cord was used to hang it for the photo, but the plan is to use a silver or chrome plated chain for it in the long term.

The red water glass has a rather interesting effect - note the distortion of the street lamp behind the panel in the photo!

Monday, 12 September 2016

Storing Glass

One of the challenges faced by anyone who works with glass is storing it in a way that a) is safe, b) offers some protection to the glass, and c) allows it to be seen and selected fairly easily.

In the past I've kept mine in boxes under a workbench, or otherwise hidden away, and a consequence has been that I've ended up buying a piece of glass for a job for which I've already got something suitable, and I then end up with loads of quite expensive glass that I might not use.

I had an old bookcase in my garage which has come to the rescue. The bottom shelf is big enough to take an A4 file without any of it protruding; a coat of white paint and suddenly it started to look the part.


On the top two shelves there's plenty of space for tubs of cement, whiting, and containers of small offcuts of glass. The bottom shelf is ideal for the larger sheets, but I had a problem - how to keep them in a way that that allowed me to see what I had.

A visit to Wilko's solved that: these magazine files are available at £2.75 each, and have holes to allow them to be hooked onto a pair of screws - ideal to stop the file toppling over and breaking the glass.


I fitted screws to the back of the bookcase and, for the time being at least, I have enough storage for my glass! I bought five of the magazine files to start with, and have since got another three; there might be space for one more should I need it.


Wednesday, 24 August 2016

Some simple discs make a huge difference to garden table and chairs


We had an old metal garden table and chairs rusting in the corner of the garage. They had circular insets containing ceramic disc tiles that weren't terribly inspiring.


Removing the ceramic tiles wasn't a great challenge, and the table and chairs looked much better for a coat of white Hammerite.


To replace the ceramic tiles I made up two discs for each: one in plain mirror glass (sealed with varnish to keep the damp away from the silvering), and one in a coloured English Miffle pattern. The mirror reflects the light back through the muffle pattern, giving a sparkling finish that will stand out wherever the furniture is in the garden.


Thursday, 11 August 2016

Ornaments and suncatchers from leftover glass


One of the problems that I get after making up some panels is that I have a small amount of glass left over. It's a shame to chuck it, so in between major projects I make up some small pieces to sell at craft fairs. Angels (above) are quite popular, although I'm not wholly keen on the copper foil work needed to make 3D items - it uses a lot of solder and the fluxes used for copper can make light work of a soldering iron bit ...


Small leaded panels featuring crosses or other simple emblems are also popular, and there can be some seasonal specialities, like for Halloween ...


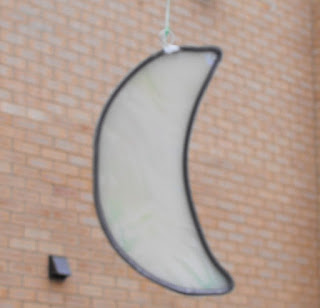
I personally quite like moons - crescent, or half, as shown here; if I have a suitable piece of mainly white glass, a full moon can look good too ...


I try to keep these simple, so they can be realistically priced at just a few pounds, or less, yet still enable me to justify the time making them and attending the show.

Tuesday, 2 August 2016

The importance of panels being properly supported, especially in doors or large openers

One of the main reasons that leaded panels fall apart is that they aren't properly supported ....

That is an obvious statement, but in the modern age few people actually understand how a panel is held together, and it's very tempting to take things out to provide clean lines in our homes. To prevent excessive movement, any leaded light panel with a dimension over three feet (or, in a door, over two feet) must be supported with saddle bars - as per the photo below.


Saddlebars are often removed in the desire for cleaner lines, but this is always a mistake. (It is possible to co-ordinate them with the decor - with a brass sleeve, or even white plastic; and I do now recommend fixing the panel to the bars with cable ties, rather than the traditional twisted wire - which will rip dusters to pieces when you clean your windows!).


Doors, window openers, and any panel that is exposed to strong winds are particularly at risk. When new, a panel will be rigid, the glass held in place firmly by cement; over time ( thirty - eighty years) that cement dries, loses it's adhesion on the glass, and the panel becomes weaker. Eventually pieces break and have to be replaced - at which point saddle bars should be put back, and new cement spread to hold it all together again. This is a job I've had to do on a number of occasions; the photo below is actually a time when this wasn't quite the case - the breakages were caused by a broken sash cord, but saddlebars had still been taken out!


If you have a really smashing time when such a problem arises it may be better for the panel to be rebuilt with new leads - but, if only three or four lights are broken, in situ repairs may be easier.

The window in this second photo had clearly had the problem before - moct of the glass was English Muffle, but some water glass had been used as replacements (not such a good idea for a bathroom, which this was!)

Monday, 4 July 2016

Modern panels fixed to uPVC doors

Like it or not, uPVC windows and doors are used widely by the building trade. They aren't really 'maintenance free' and they don't last for ever (unlike a properly maintained leaded panel fitted in a wooden frame) - we've all suffered from misting when the seals go, and then the only answer is a new unit.

Worse, uPVC windows are ugly. Big chunky white frames blot out the light like a size 20 woman in a bikini. The sealed double glazed units let light through perfectly; sometimes, too perfectly - who wants a view of a twenty foot high brick wall at the bottom of the garden? And you don't want the whole patio door in frosted glass because, yes, you'd rather like to see your garden.

It was to solve this 'view of a twenty foot high wall' problem that I made these panels. Roughly 20 by 12 inches, the Wissmach glass refracts the glass into a rainbow effect, with the coloured lights giving some impact, fitting the top of a double glazed patio door unit.


The panels are edged with zinc came to provide rigidity.

Fitting something like these to a uPVC frame will always be a challenge; I've used 3M's 'Command' self-adhesive hooks, with large ones at the top (each rated at 3lb) at the top, taking the weight, and little 8oz ones at the bottom keeping the panel tight against the frame. For security, I've added 0.4mm silver plated wire loops up to the sash lifts (which I added for this purpose, to match those on the adjacent windows). These should hold the panel if one of the hooks does give way. The sticky pads for the hooks have been kept clear of the moulding that's used to retain the double glazed unit in the frame.

The panel can be lifted out of the hooks for cleaning.

With uPVC frames you have to be careful - you can't put screws in just anywhere! The 3M hooks can be removed completely, and shouldn't affect the integrity of the frame.

With the warm weather recently these doors have been open, a very different effect occurs with the morning sun catching the pattern in the Wissmach: